Wet Aging Beef in Your Refrigerator
Introduction: Crumbling Beef
Maybe you've seen some very expensive steaks in a eating place and wondered what all the fuss was about. Anile beefiness is, as the name suggests, the procedure of letting meat age for a period of time to increment its flavour and tenderness. Aging beef isn't just the realm of high-terminate steak houses, you can easily age beefiness at home and I am going to show you how.
Here'due south what you'll need for this class:
Tools:
- viii-12" Kitchen knife
- Pocketknife steel
- Large cutting board
- Stainless steel kitchen tongs
- Mini refrigerator
- Desktop fan
- Big glass dish
- Kitchen tea towels
- Salt (Kosher is best but ocean common salt is peachy, as well!)
- Instant-read thermometer
- Probe-style thermometer
- White vinegar
What's The Beef With Aging?
This is a carefully controlled process where the meat is left for up to five weeks in a refrigerated setting to allow natural enzymes to break down the tougher muscle fibers and connective tissues, making the meat much more tender. Enzymes are also responsible for changing the season of the beef to be much more complex, deepening the beefy flavour and calculation in new notes non present in fresh cuts of beefiness.
Why Is It So Expensive?
Dry aged beef is expensive considering information technology has been advisedly maintained in a temperature controlled surround for over a calendar month, and considering the meat loses moisture (weight) the the price per pound increases. This is in add-on to the unique flavor that dry out aging produces. All things combined, you've got a steak feel that's worth the price tag.
Wet vs Dry Aging
You may accept heard the terms wet crumbling and dry aging when referring to meat. To empathize the difference we need to take a look atboth processes.
Moisture aging is when beef is placed in a sealed bag and left to sit in the fridge for a period of fourth dimension, the supposition is that during this fourth dimension the meat volition stew in its own juices (or a brine if yous add salt) transform into a more flavorful steak.
Dry aging is when the meat is exposed to air, oxidizing the fat and meat through enzymatic reactions. There is a large amount of moisture loss with dry out aging, and the exterior sections of the beef will need to be trimmed.
Which Is Better?
In my opinion, wet aging isn't actually aging the beef at all. Roofing the beefiness inhibits oxidation, which is what assists in the aerobic biochemical process. True aging involves exposing the meat to air, which is what gives aged beefiness a season that no other method can produce.
It's true both styles will increment the tenderness of the beef, but only dry aging volition produce the flavor contour that makes aged steaks the holy grail of beef connoisseurs. In this lesson I will only be discussing dry aging beef. In that location's no art in wet aging; stick meat in handbag and call it a twenty-four hours - for those up for a challenge, read on!
Tin can Any Cuts Be Anile?
Probably, but the all-time cuts to age are from the rib or short loin. Consign rib, prime number rib, beef ribs, ribeye roast, standing ribs, and a host of other names are applied to the big cut of beefiness cut from the upper rib department of the steer, which is one of the primal cuts - of which we discussed Cuts Of Meat lesson. For this lesson I am using a rib cut.

source - wikipedia
In this lesson I used 8 lbs. of prime rib, which is the smallest size you lot'd want to consider. Yous tin can get larger if you wish. To become the virtually out of your dry aging you'll desire a cut that has the fat cap still on, and the bone if possible. This volition allow you the most production to piece of work with to conduct your crumbling.
Can I Age Just One Steak?
No. You lot demand a big cut of beef to dry age since there's a lot of moisture loss and the beef will demand to exist trimmed to get to the edible section inside the outer beat. If you lot were to age only one steak, there would exist cypher edible left after the moisture loss and trimming.
Stride 1: Supplies
The three almost important things for dry aging beefiness at domicile are temperature, humidity, and air circulation. All 3 are easily managed with a small fridge dedicated to just crumbling meat, an inexpensive desktop fan, and a big dish for drippings and holding h2o. You'll as well desire to go an instant-read thermometer to bank check your fridge temperature before placing your meat inside.
You might exist tempted to forego getting a small secondary refrigerator, opting instead to just historic period the beef in your existing fridge that y'all use for everyday food. Don't exercise it! Invest in a second fridge.
Using your existing fridge to dry age beef is a terrible thought because there'southward going to be a smell unlike anything yous've smelled before. Image smelly feet standing in a dish of moldy cheese; this comes close to the smell you might encounter when dry crumbling. The olfactory property of rotting beef sounds gross (and information technology is), but this means the process is working and enzymes are breaking down the beefiness and turning it into something wonderful. Unless yous want to take all your food odor like this, it's all-time to go on your dry aging independent in information technology's own refrigerator.
Before diving into preparing the beef let'south talk well-nigh the refrigeration setup, and how all these elements go together.
Step 2: Refrigerator Setup
To effectively dry age beefiness we need a temperature controlled environment, and abiding airflow. Luckily both of those things are easy enough to control, with a minor refrigerator and a compact desktop fan.
Open up the fridge door completely and feed the fan power string through the gap between the door and the body of the refrigerator. When the fridge door closes the rubberized seal should easily cover the fan power cord - depending on your fridge model you may have to modify your fridge seal to ensure there's skillful contact effectually the fan ability string.
The aim is to have the fan at the lesser of the refrigerator pointed upward, circulating the air around the enclosure and over the beef.
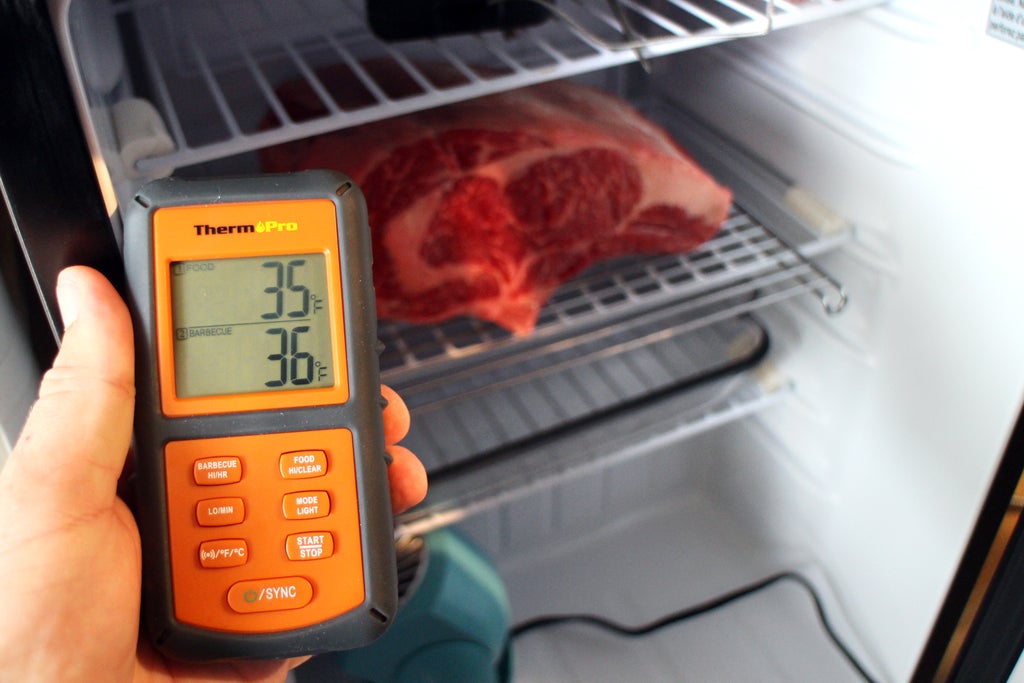
Temperature is critical when aging beef. If your fridge doesn't become cold enough, bacteria tin grow and ruin your meat, too cold and the meat can freeze. The ideal range is 32-39°F (0-4°C), which every refrigerator should accept no problem handling. The best way to cheque this is with a thermometer. Don't trust any comes with the refrigeration unit - use a reliable handheld thermometer to requite you accurate readings.
With the fan installed and the fridge racks spaced so there's room for both the beefiness and the drip dish underneath, set your fridge to the correct temperature and allow the appliance to acclimate. The baste dish here will capture whatever beef drips that may escape over the offset few days, and tin can as well work as a water reservoir if you live in a very dry environment and need a little extra humidity. For my beef I found having extra water in the dish didn't make much of a deviation with humidity, so I used it merely as a drip catcher.
Step 3: Preparing the Rib
Depending on where you get your consign rib, it may or may not be vacuum packed. Many wholesale butchers will portion the meat into large cuts, vacuum bundle them to remove the air, and and so ship them all over the place in refrigerated trucks. Packaged this way, meat tin final weeks if kept in a temperature controlled environment - in fact, this is essentially what moisture aging is.
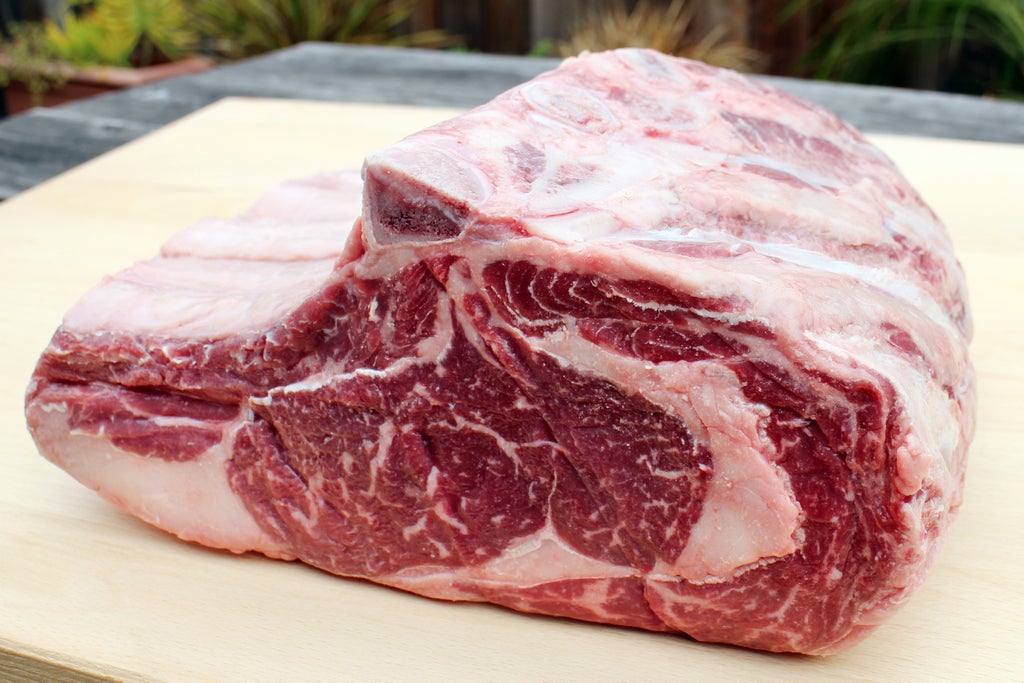
In this lesson I am using 8 lb. of export rib with the fat cap attached, and the rib and every bit many bones withal in as possible (this will allow y'all the most to piece of work with). The fat cap is disquisitional every bit it will serve every bit a blanket over the tiptop part of the meat, protecting the compact parts underneath during the aging. The fat cap and bones will exist trimmed off later, after crumbling.
For dry out aging, we'll need to remove the rib from it'due south packaging and prepare the surface. Remove the beef from the packaging and rinse under cool water until clean, then pat dry. Although the beef has been hermetically sealed in a (hopefully) sterile environment, applying a salty brine solution to the exterior of the beef will assist in preventing surface bacteria from growing while it'southward crumbling. Here's a simple brine:
- 1 gallon (3.5 liters) water
- 1 quart (1 liter) distilled white vinegar
- one cup (85 grams) salt
Brush the brine liberally to beef ensuring complete coverage, alternatively you lot can submerge it in the brine if you have enough. The goal is to employ a coating to assistance cleanse the beef in preparation for aging, not tenderize it in the brine. After applying brine, pat dry with paper towel and place on a make clean cutting board.
Your beefiness is at present set up for the fridge, then make sure you have make clean hands and that no flies state on it while it's exposed. Flies can lay eggs on raw beefiness which plough into maggots when they hatch, so continue your beef protected from the moment it's out of the package to when yous seal it into the refrigerator.
When you're ready, transfer the beef into the fridge and allow sit for a few weeks.
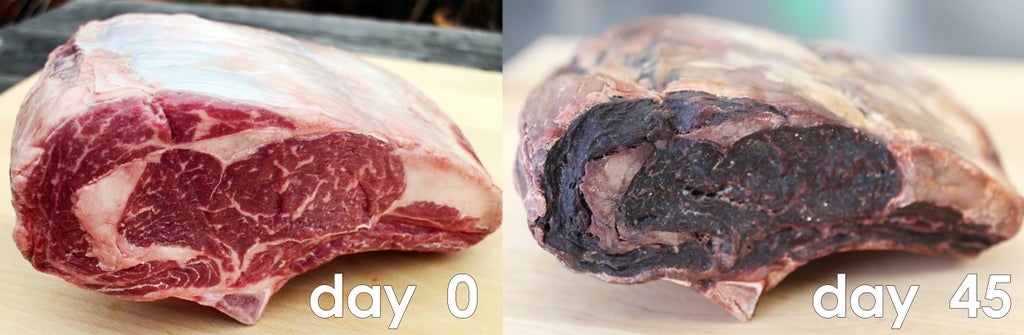
Step iv: 45 Day Expect (or More!)
The virtually of import factor for the enzymes to break down the meat is fourth dimension.
One time in the fridge aging the beef needs at least 45 days for there to be a substantial change in the texture and sense of taste. During this time the beefiness will lose wet through evaporation and the weight can be equally much equally 30% lighter.
After about a week you lot'll start to notice the surface texture looking dark and feeling tough to the touch. Examine the beef for signs of mold or whatsoever other grossly unattractive areas. Dry aged beef volition have a funky olfactory property, but if washed correctly should not exist rotten and definitely won't have much (ideally any) surface mold. If y'all do accept surface mold bank check your humidity and temperature levels to ensure that your surroundings isn't likewise moist or warm. Cut away mold so it doesn't spread is the best grade of action, just you're losing product and exposing new beef to air now and will need time to class a dark husk like the balance of the cut. Best to cheque on your rib every few days at the commencement to ensure it's looking good, then peeking in periodically until the 45 day marking.
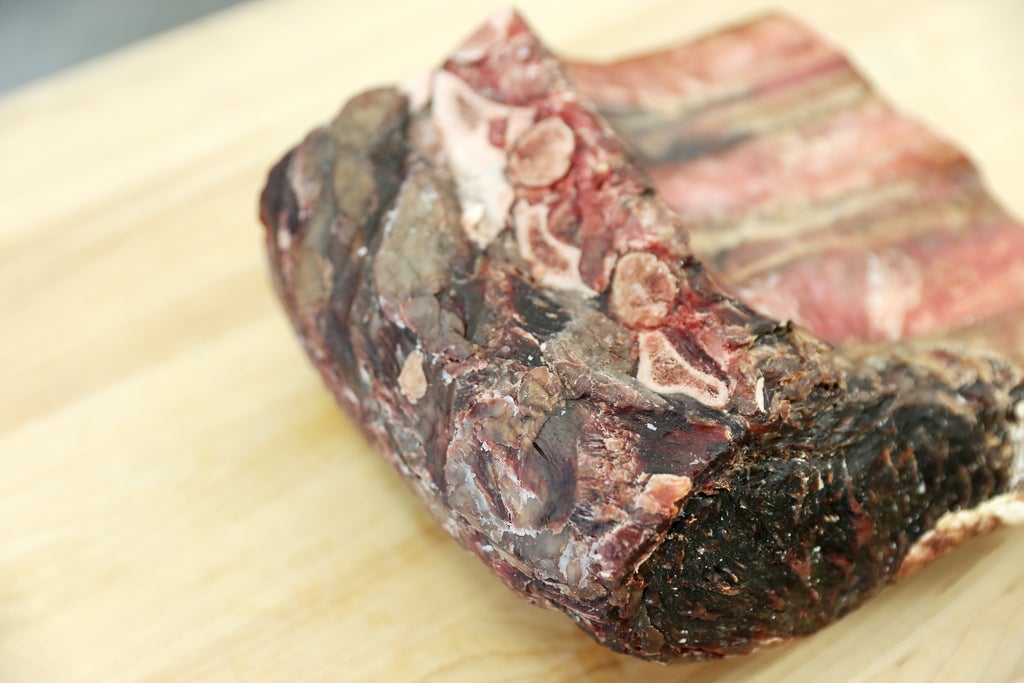
After 2-3 weeks the outside volition be a dark, bark-similar crust effectually the entire cut, some areas volition exist shriveled up and weird looking.
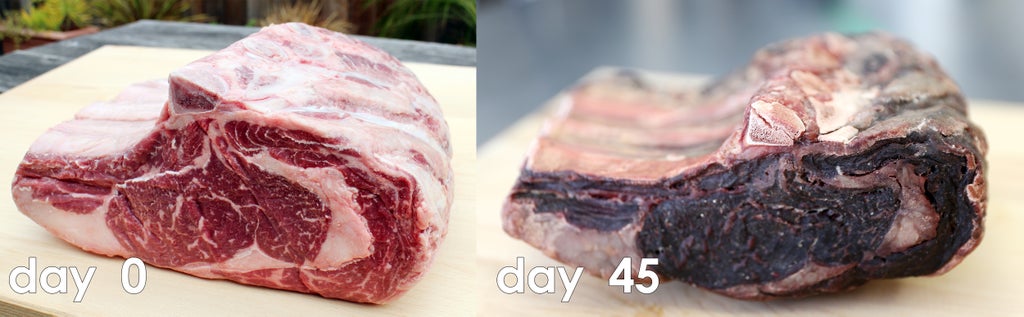
6 weeks in, your beef will have a difficult outside and be a very nighttime color. You should be able to push on the meat and feel the insides give a picayune, this is proficient. There should be minimal (or no) surface mold. The smell should be horrendous - this is good!
After 45 days the enzymes have had enough time to make a noticeable alter in the texture and gustatory modality of the meat. If you lot accept more time you can keep aging up to 60 days. Because my rib cut of beef was small I decided to halt the aging here and begin trimming.
Pace v: Trimming
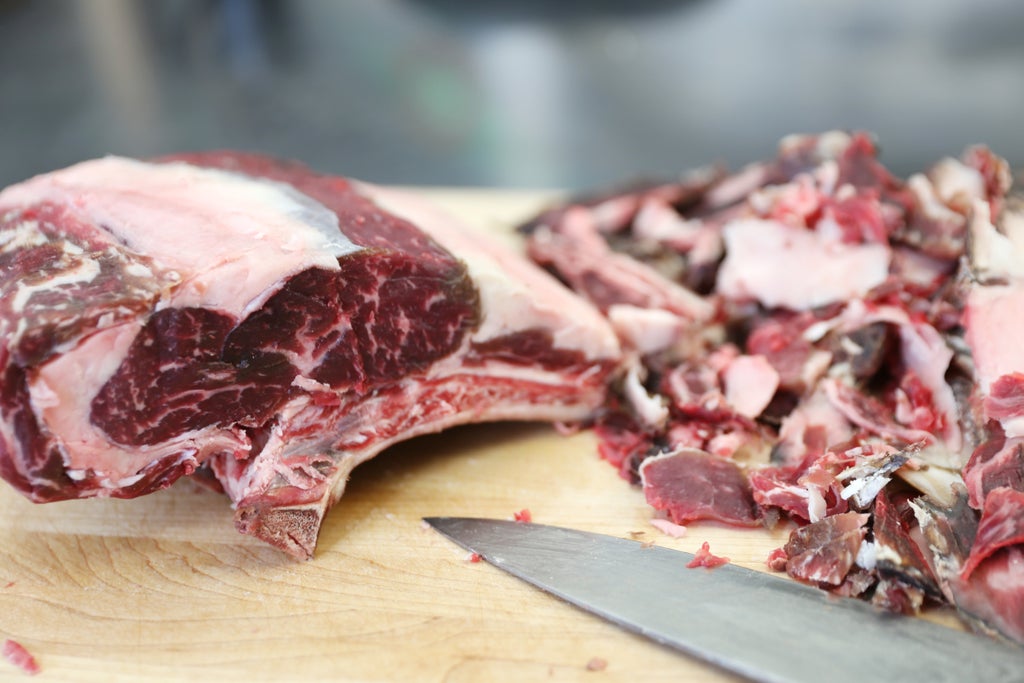
Now that you've got this funky slab of meat, it's fourth dimension to trim off the gross exterior and reveal the pristine insides.
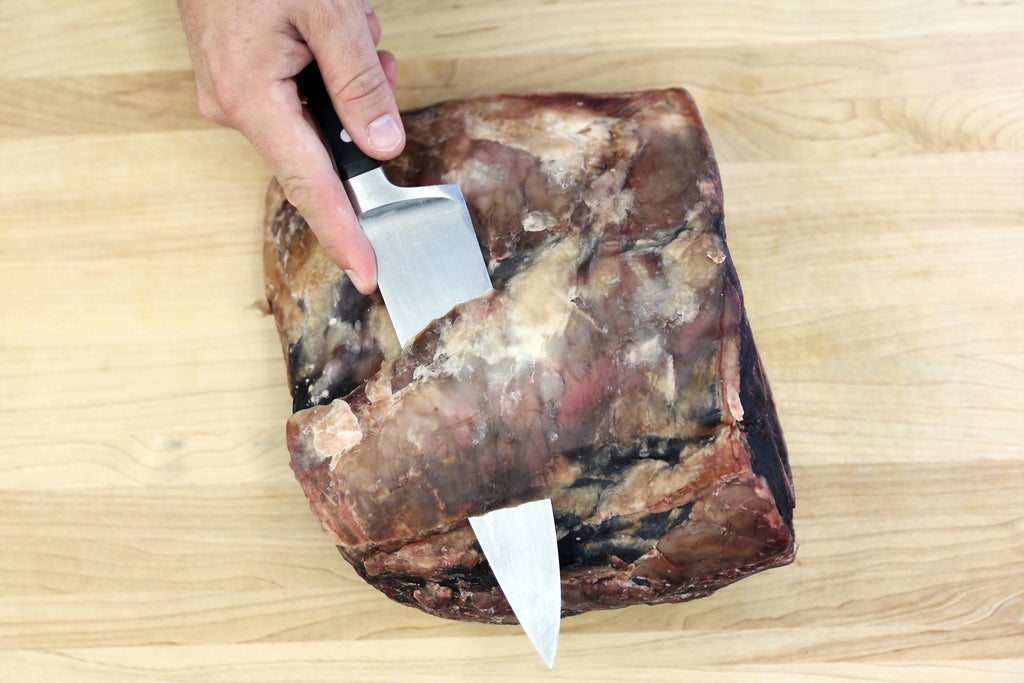
Information technology doesn't matter where yous starting time, as you'll run across a clear difference in texture and color when trimming off the bark and seeing the pink interior coming through. The fatty cap can mostly exist removed, but a fiddling fat left on is a skilful thing (provided it's not rotten).

Keep trimming around the beef, removing all hard bark and exposing the pinkish insides.
Flip the beefiness over and go along working on all sides until all the dark and hard exterior has been removed. If you're in uncertainty just carefully cleave information technology off.
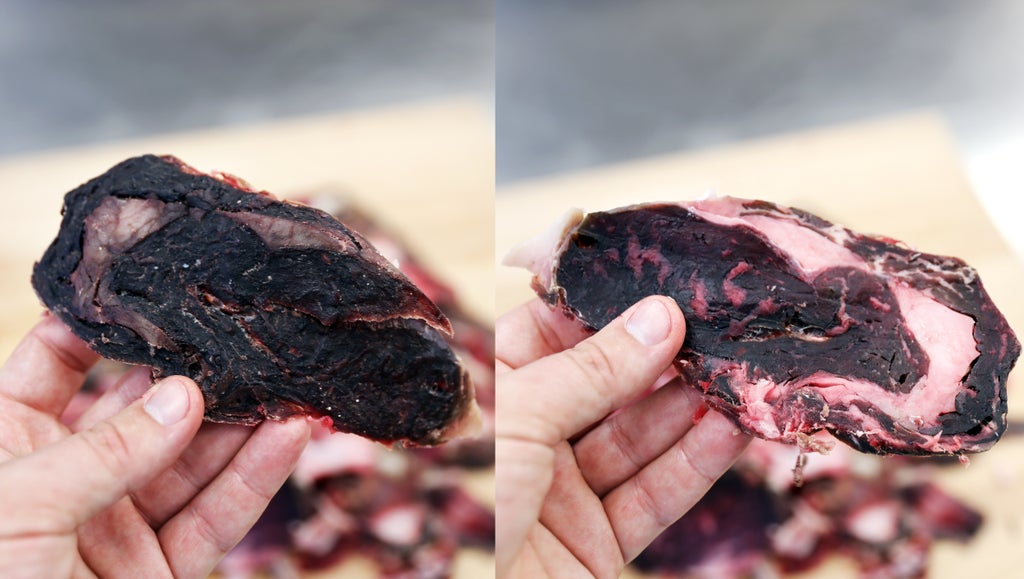
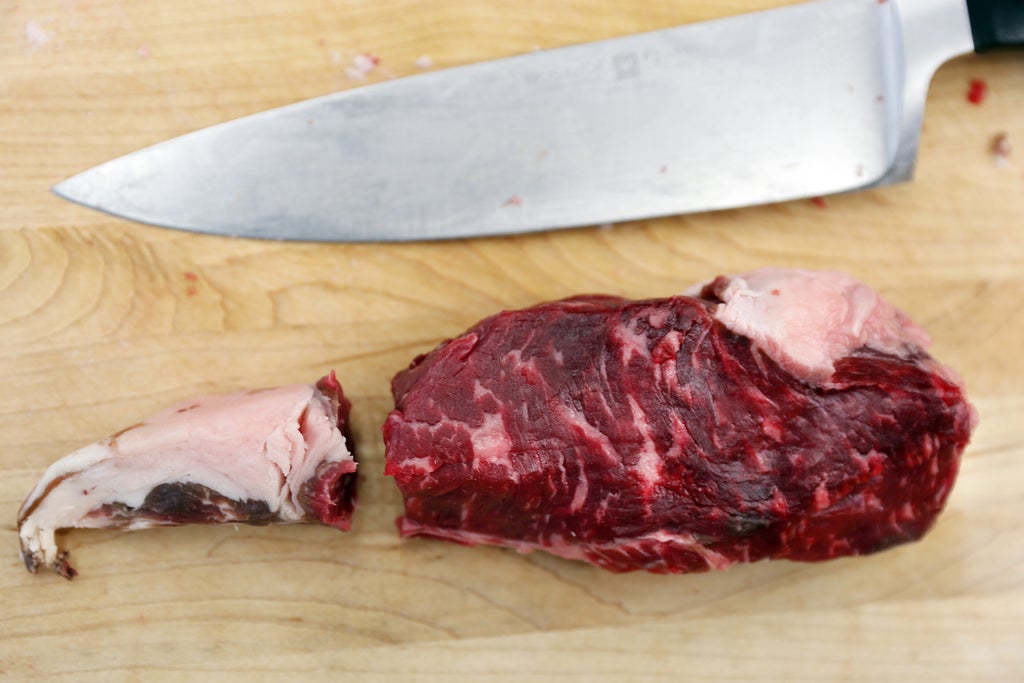
LEFT: End cap of beefiness showing the hard exterior. Right: Reverse side of cease cap showing some preservation.
There will be a lot of waste through trimming the beef, this is partly why it's such an expensive product. Removing meat results in less product than you originally paid for. The results are worth it though, trust me.
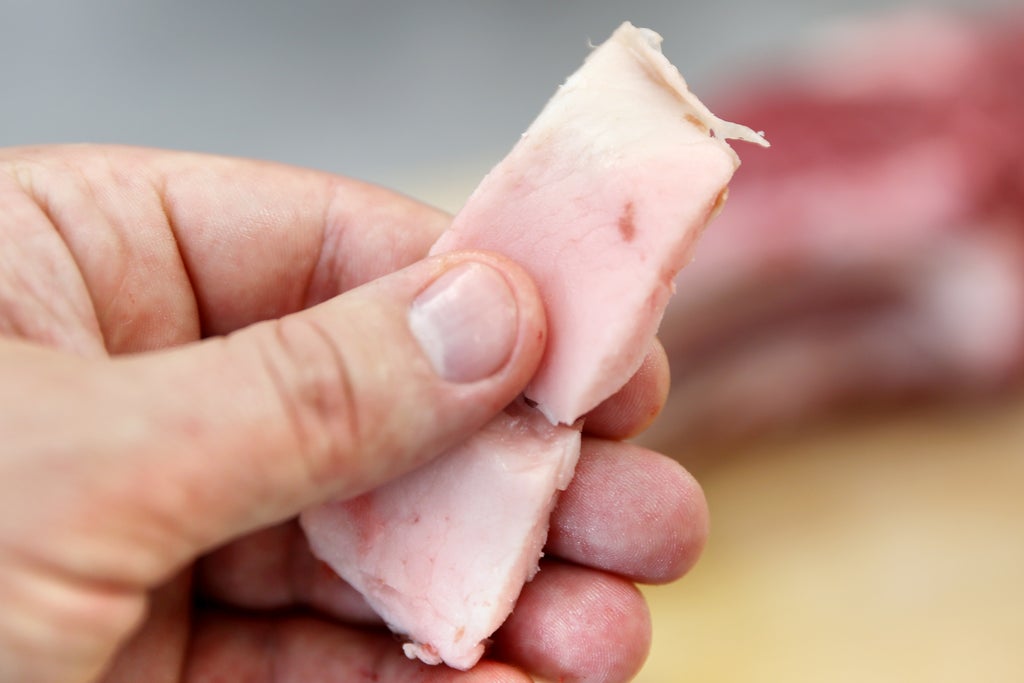
It'due south not merely the meat that goes through a conversion during aging, the fat also loses moisture and becomes much harder with a very buttery experience.
Step vi: Post Trim Examination
Later on trimming the hard crust and all night areas of the beefiness that are unsuitable for eating, it'due south a proficient time to take a step back and examine your results.
Accept a look at your beef and decide how you're going to cutting it into more manageable cuts. If yous've got the bones still in so information technology's as like shooting fish in a barrel as cut between the basic, but take care every bit are chine bones that run latterly and will need to be removed commencement.
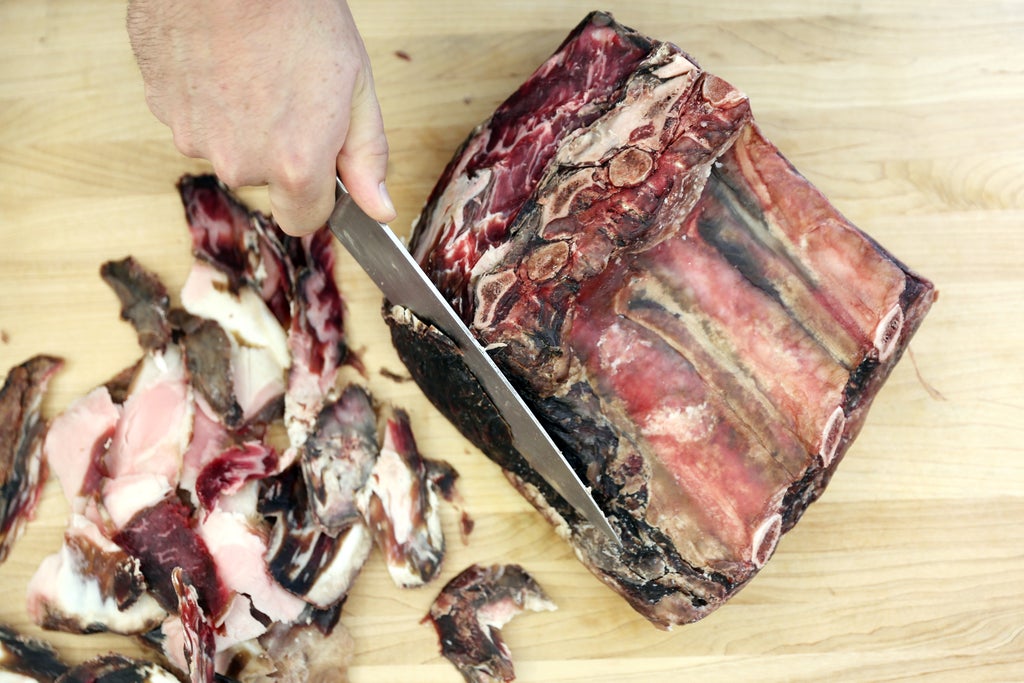
Footstep vii: Making Cuts
Breaking down a large section of rib like this is easy with bones in, since you just follow the length of the bone down to guide your cuts, resulting in large cuts that are all-time shared.
Before we tin start chopping we'll need to remove the chine bone.
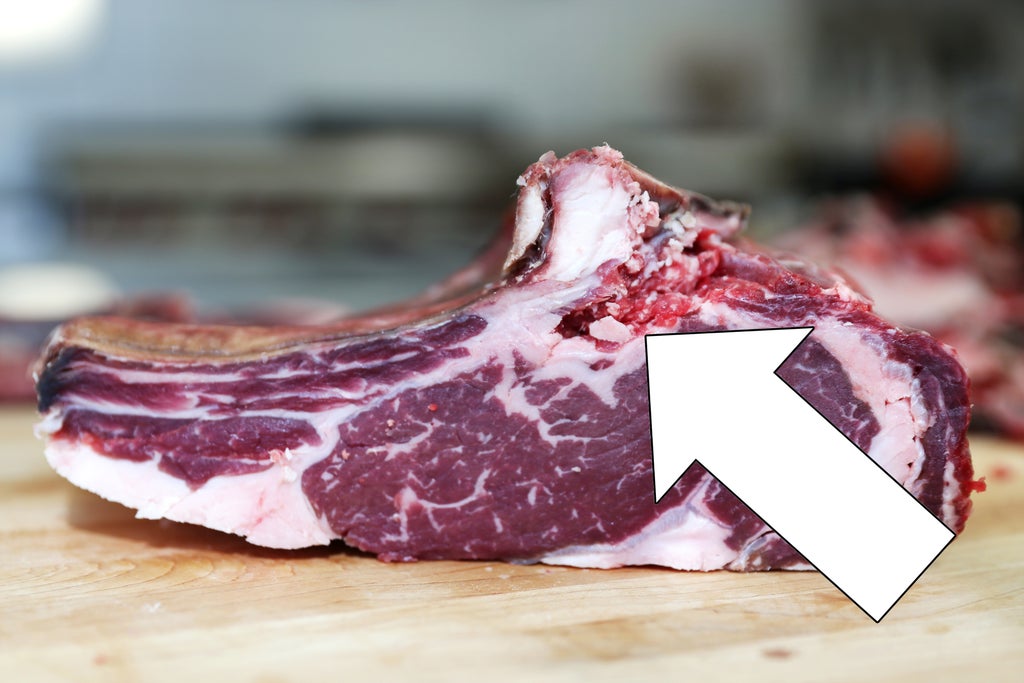
The picture show above shows where the chine os was removed. This bone can run deep inside the beef, so employ a modest paring knife to cut away any connective tissue then work the bone out. After, you lot can make cantankerous cuts along the rib bone to make your steak cuts.
For whatever additional meat outside of the bones, or if you lot aged a cut that didn't have any ribs, make your cuts about an inch thick. Without the bone to support these cuts you tin can usually remove the fat tail from the steaks without missing much, just the acme fat cap however should be left on for additional flavor.
Pace 8:
The cuts made from anile beef are likely going to exist big enough to feed 2 people. I find it'southward easier to prepare and cook a thicker cut of steak than to go on cut into smaller portions.
These larger cuts are cracking for stove height cooking, or on the grill. Remember that with thicker cuts yous'll need to allow for some additional cooking time, and don't forget your Instant-read thermometer to get the doneness you want.
Yous've now learned the art of crumbling beef in your own habitation, giving those high-end restaurants a run for their money. The process isn't hard, and you tin can continue to refine the process, dialing in your methods and achieve beefy perfection. Do you have any photos of crumbling beef at home? I want to see it! Share your results in the comments below.
Pace 9: Taking the Next Steps
This form aimed to requite you an appreciation for how deep the topic of butchery and meat training is, and ways you can approach working with beef in a unproblematic to understand format. These foundational skills will commencement you on a very rewarding path that you'll hone and make your ain over time. With these skills, yous'll feel informed at the butcher and be able to identify and break down meats based on your desired meal, all with knowledge and confidence!
At present that you've got the basics down you're ready to tackle a few more areas on your ain. How about trying your hand at charcoal instead of gas or electric? What about swapping beef for pork? There'due south actually no end to what culinary creations you're capable of now that you lot know the basics!
Here's some other culinary cuts yous might be interested in

Best Way To Beginning Charcoal
Flavor Cast Iron
All-time Pulled Pork
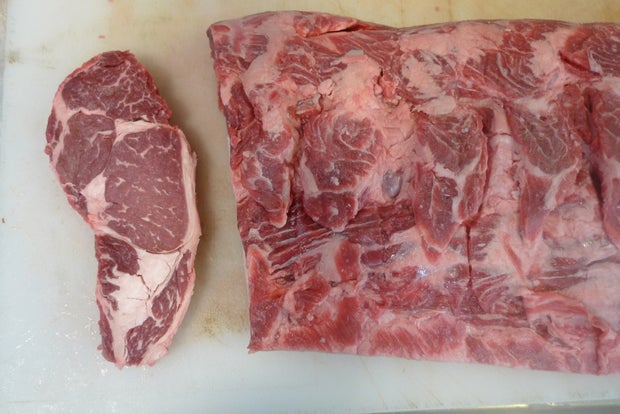
Simple Steak Slicing
BBQ Chimney Starter
Easy Beefiness Jerky
5 People Made This Projection!
Recommendations
Source: https://www.instructables.com/Aging-Beef/
Post a Comment for "Wet Aging Beef in Your Refrigerator"